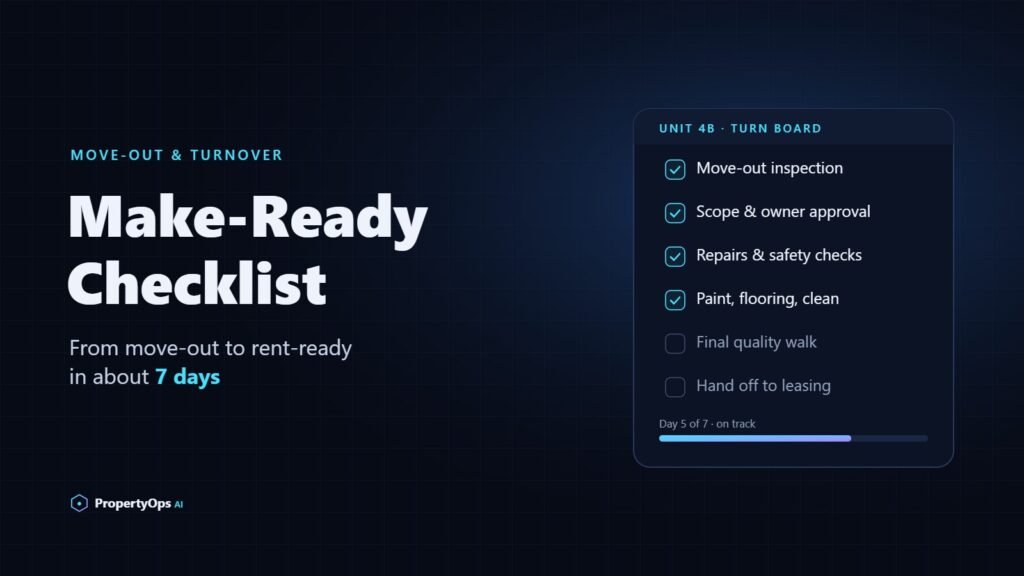
Quick answer: A make-ready checklist is the step-by-step list a property manager follows to take a unit from move-out to rent-ready: inspect, scope and approve the work, schedule vendors in the right order, clean, run a final quality check, and hand the unit to leasing. Small property management teams that start planning at notice, give one person ownership of each turn and book trades back-to-back can usually finish a standard turn in about 3 to 7 days.
Why make-ready speed matters
Every day a unit sits empty costs the owner rent that never comes back. Based on a national average effective rent of about $1,818 a month in January 2025, each vacant day is worth roughly $60 in lost rent, and US stabilized apartments averaged about 34 vacant days between move-out and the next move-in at the end of 2024 (RealPage figures, via Lula). Most of those days are not repair time. They are waiting time: waiting for a scope, an owner approval, a vendor slot or a final walk-through.
A good make-ready checklist removes that waiting. It makes sure the next step is already booked before the current one finishes.
The make-ready checklist, phase by phase
1. At notice to vacate (before the resident leaves)
- Log the move-out date, forwarding address and deposit details in your property management software.
- Send move-out instructions so the resident knows the cleaning standard, key return and final meter readings.
- Review the move-in inspection report and photos so you know the starting condition.
- Pre-book a cleaning slot and a painter for the expected turn window.
- Assign one turn owner, the person responsible for moving this unit to rent-ready.
- Tell leasing the likely ready date so marketing can start early.
2. Move-out day: inspection and documentation
- Walk the unit room by room and take dated photos and video.
- Compare against the move-in report and note normal wear and tear separately from resident damage.
- Record items left behind, missing keys, remotes and fobs.
- Check smoke and carbon monoxide detectors, water heater, HVAC, plumbing fixtures, appliances, doors and locks.
- Take final meter readings and confirm utilities transfer to the owner.
3. Scope, budget and owner approval (day 1)
- Turn the inspection into a written scope with a line for every repair and an estimated cost.
- Apply the owner’s approval threshold from the management agreement. Anything under it is approved automatically. Anything over it goes to the owner with photos the same day.
- Request bids only for larger items such as flooring, appliances or major repairs.
- Create one work order per trade so each vendor sees only their part.
4. Repairs and safety (days 1 to 3)
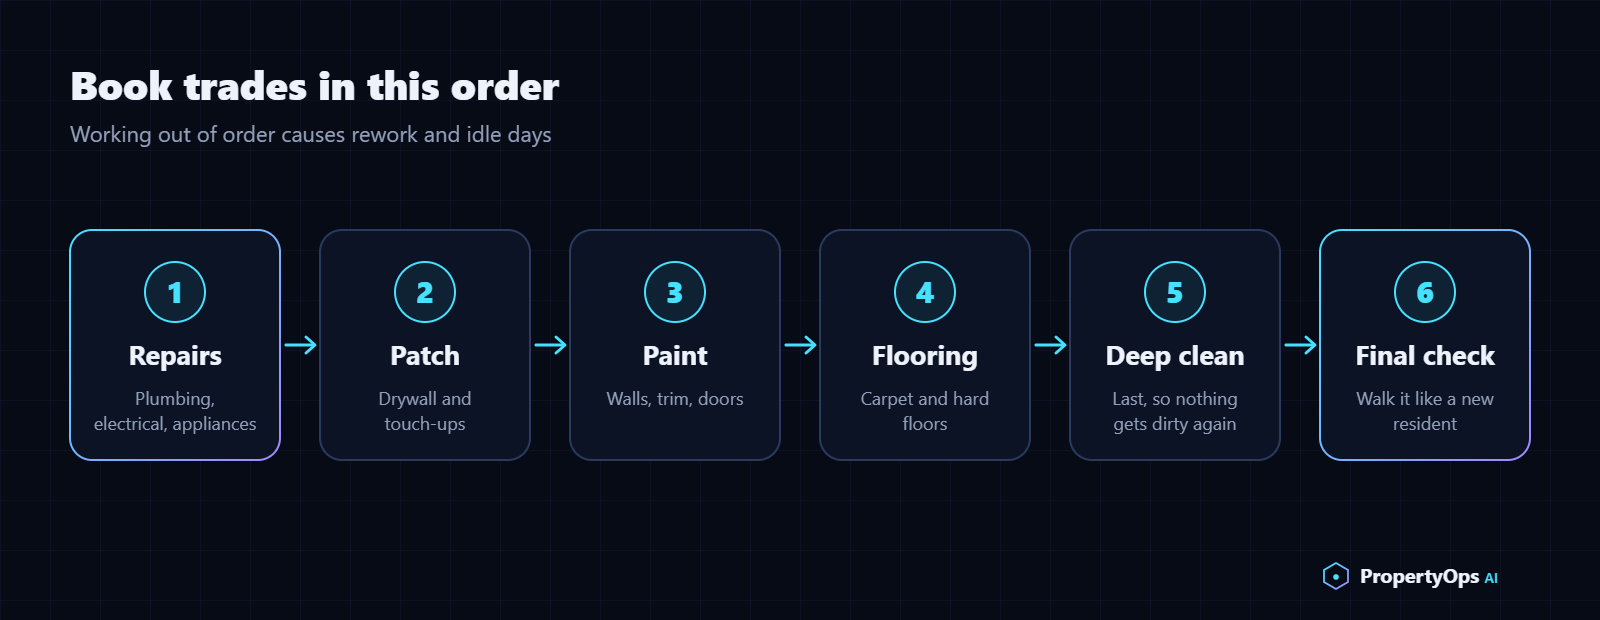
- Schedule trades in order: repairs and plumbing or electrical first, then drywall patching, then paint, then flooring, then cleaning last. Working out of order causes rework.
- Change locks or rekey, and update the key log.
- Replace the HVAC filter, test smoke and CO detectors, and confirm every outlet, light and appliance works.
- Fix anything a new resident would report in their first week: dripping taps, running toilets, loose handles, missing blind slats.
5. Paint, flooring and cleaning (days 3 to 5)
- Touch up or fully repaint based on your repaint policy and the wall condition.
- Clean or replace carpet, and repair or refinish hard floors.
- Do a full clean last: kitchen, appliances inside and out, bathrooms, windows and tracks, cabinets, baseboards, vents and floors.
6. Final quality check (day 5 to 6)
- Walk the unit with the checklist as if you were the new resident.
- Take a fresh set of rent-ready photos for the owner and for the file.
- Close every work order in your software and attach invoices.
7. Hand off to leasing and move-in (day 6 to 7)
- Mark the unit rent-ready so it can be shown and listed with current photos.
- Confirm the move-in date, utilities set-up instructions and key handover.
- Prepare the move-in inspection form so the new resident can record condition in the first few days.
8. Close out and report to the owner
- Send the owner a short summary: total cost, before and after photos, vacant days and anything to plan for at the next turn.
- Process the security deposit accounting within your state’s deadline.
- Note what slowed this turn down, so the next one is faster.
A sample 7-day turn timeline
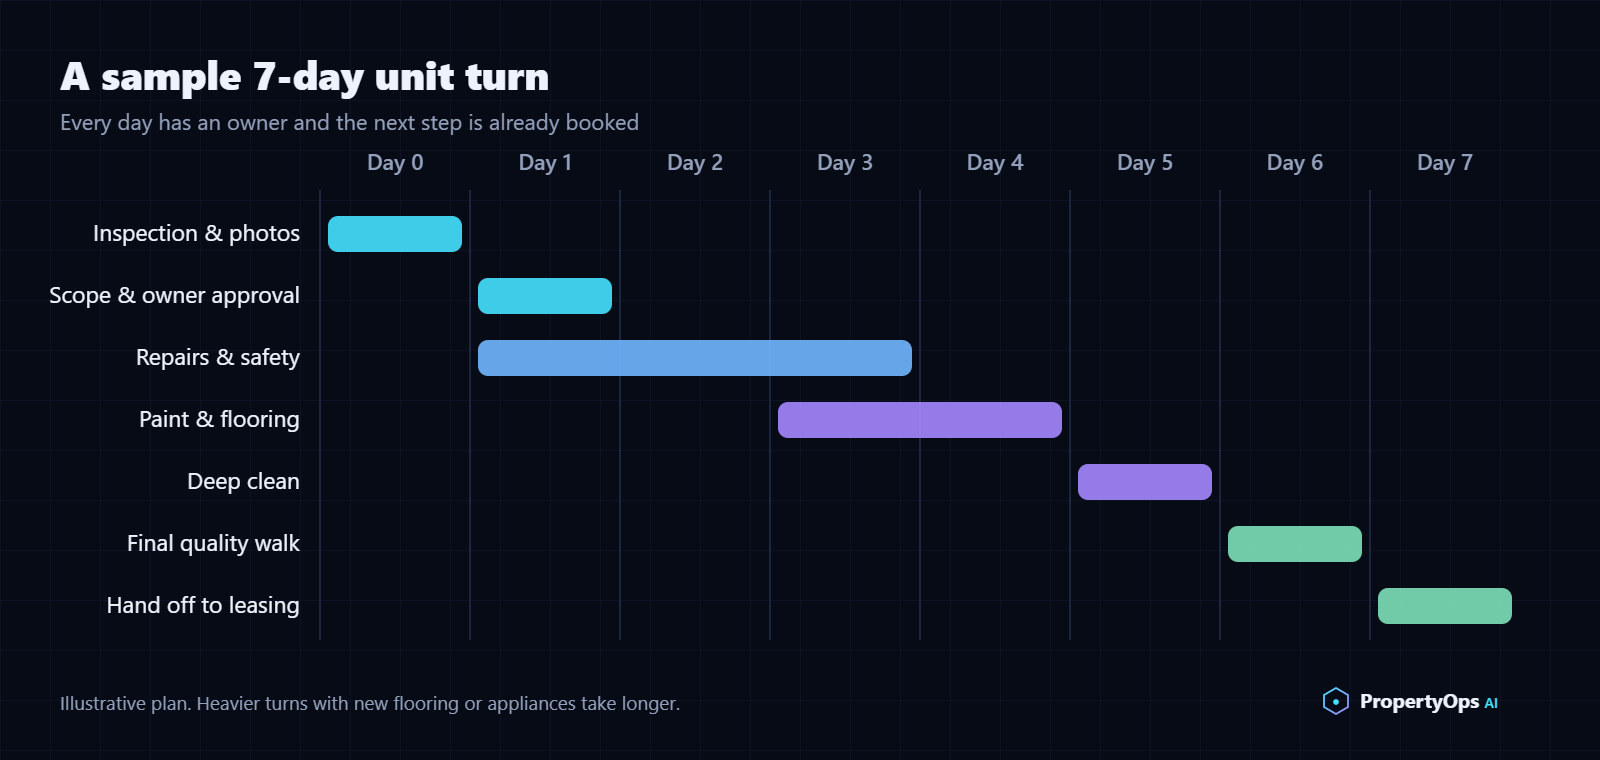
| Day | What happens | Who owns it |
|---|---|---|
| Notice period | Move-out instructions, vendors pre-booked, turn owner assigned | Property manager |
| Day 0 | Move-out inspection, photos, utilities transfer | Turn owner |
| Day 1 | Scope written, owner approval sent, work orders created | Turn owner |
| Days 1 to 3 | Repairs, safety checks, rekey | Maintenance vendors |
| Days 3 to 5 | Paint, flooring, final clean | Painter, flooring, cleaners |
| Day 6 | Final quality walk, rent-ready photos, work orders closed | Turn owner |
| Day 7 | Listed or shown, move-in confirmed, owner summary sent | Leasing and property manager |
A heavy turn with new flooring or appliances will take longer. The point of the timeline is not the exact number of days. It is that every day has a named owner and a next step already booked.
The most common reasons turns run long
- The scope is written late. If the inspection happens but the scope sits in a notebook, vendors cannot be booked.
- Owner approvals wait for a reply. Clear approval thresholds in the management agreement prevent most of this.
- Trades are booked one at a time. Booking the painter only after repairs finish adds days of idle time.
- Nobody owns the unit. When maintenance, leasing and accounting each assume someone else is chasing the turn, it stalls.
- Materials are not on hand. Keeping standard paint colors, filters, smoke detectors and common hardware in stock avoids ordering delays.
Where automation helps, and where it should not
Simple automation can take the follow-up work off your team without taking decisions away from people. Useful examples for small teams:
- A turn board that shows every unit, its stage and its target ready date in one place.
- Automatic vendor reminders the day before a scheduled job, and a nudge when a work order is not closed on time.
- Owner approval requests sent with photos and a one-click reply.
- A daily list of units at risk of missing their ready date.
Decisions about spending, deposit deductions and resident disputes should stay with a person. If you want help setting up this kind of tracking, see our make ready and turnover services and how we approach maintenance coordination. For the owner side of a turn, our tenant and owner communication and accounting and bookkeeping pages explain how updates and turn costs can be reported without extra typing.
Frequently asked questions
What is the difference between make-ready and turnover?
Turnover is the whole cycle from one resident leaving to the next resident moving in, including marketing and leasing. Make-ready is the physical part inside it: the inspection, repairs, paint, cleaning and final check that make the unit ready to rent.
How long should a make-ready take?
A standard turn with cleaning, touch-up paint and minor repairs can usually be finished in about 3 to 7 days. Turns that need new flooring, appliances or larger repairs take longer, so set the target ready date from the scope, not from a fixed rule.
Who should own the make-ready process?
One named person per unit. In a small company this is often the property manager or a maintenance coordinator. Their job is not to do every repair, but to make sure each next step is booked and nothing waits.
When should a property manager start the make-ready process?
At notice to vacate, not on move-out day. Reviewing the move-in report, pre-booking cleaners and painters, and telling leasing the expected ready date during the notice period is the simplest way to save days.
What should be included in a make-ready inspection?
Room-by-room photos, a comparison with the move-in report, a note of wear and tear versus damage, safety device checks, plumbing, HVAC, appliances, doors and locks, and a record of keys and items left behind.
Want a faster, calmer turn process?
If your turns depend on one person remembering every follow-up, a simple shared checklist and turn board can make a big difference. Book a free strategy call and we will look at how your turns run today and what to fix first.